Wall Mounting
You can mount the device on a wall using the keyholes on the bottom of the device.
|
➢
|
To mount the device on a wall: |
|
1.
|
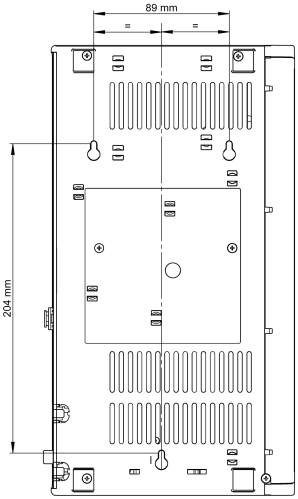
Drill three holes in the wall where you want to mount the device, using the distances between the holes as shown in the following figure: |
|
●
|
Horizontal distance between the top two parallel holes: 89 mm (5.51 in.) |
|
●
|
Vertical distance between the top two parallel holes and bottom hole: 204 mm (8.03 in.) |
|
●
|
Horizontal distance between a top hole and the bottom hole: 44.5 (1.75 in.) |
Dimensions for Drilled Holes
|
●
|
When choosing the area on the wall to mount the device, make sure that sufficient space is available for attaching cables on the rear panel. |
|
●
|
Make sure that you drill the holes in the same orientation as shown in the previous figure (i.e., two parallel holes on the top and the single hole on the bottom). |
|
●
|
Use the mounting template on the following page (print out) to mark the locations for the mounting holes on the wall. |

|
2.
|
Insert wall anchors of the appropriate size into each hole. |
|
3.
|
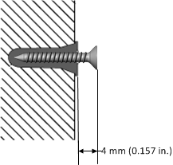
Thread screws (not supplied) into each of the wall anchors. The recommended screw type is DIN 7982 3.5x25 Phillips flat head. Make sure that the heads extend sufficiently (about 4 mm or 0.157 in.) from the wall for the device's keyholes to hang on: |
Protruded Screw Distance from Wall Surface
|
4.
|
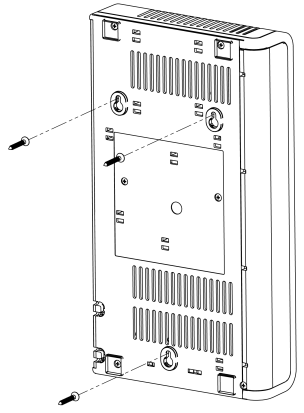
Hold the device so that it is orientated with the bottom panel with the keyholes facing the wall and the rear panel with the ports facing your right. |
|
5.
|
Mount the device on the wall by hanging the device's keyholes on the screw heads: |
Hanging Device on Screw Heads